Visuals could be one of the most important elements users should pay attention to the content they prepare. When the images are arranged in a way that appeals to the people you are addressing, you will have the chance to reach a wider audience and create more rich content. At this point, one of the best tools you can use stands out as DesignCap. So what does DesignCap offer to users, and with what features does it stand out from its competitors? We will make an introduction to DesignCap in this article.
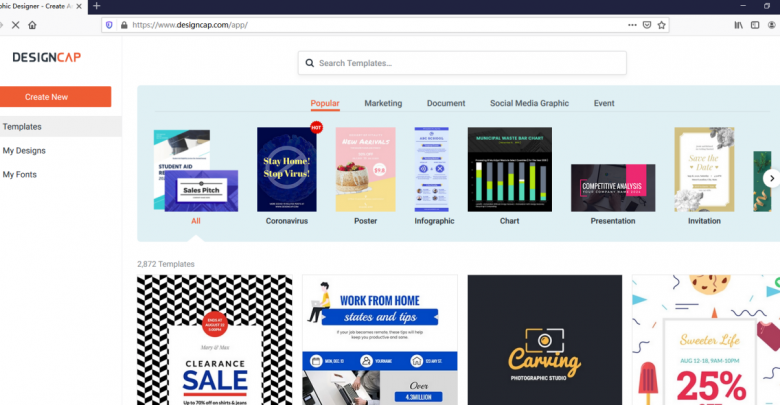
DesignCap is a web-based graphic design platform, which is produced by PearlMountain Ltd. You do not need to download and install this software. All users need to do is opening the browser to start. DesignCap has a simple and easy to use interface which makes graphic design no more a tough task. Users can create beautiful graphic designs for their business, reports, events, assignments, and social media with DesignCap. This online tool provides thousands of professional templates and millions of graphics resources for direct use, which can speed up producing time and inspire creativity. It also supports multiple languages, which is very friendly for users all over the world.

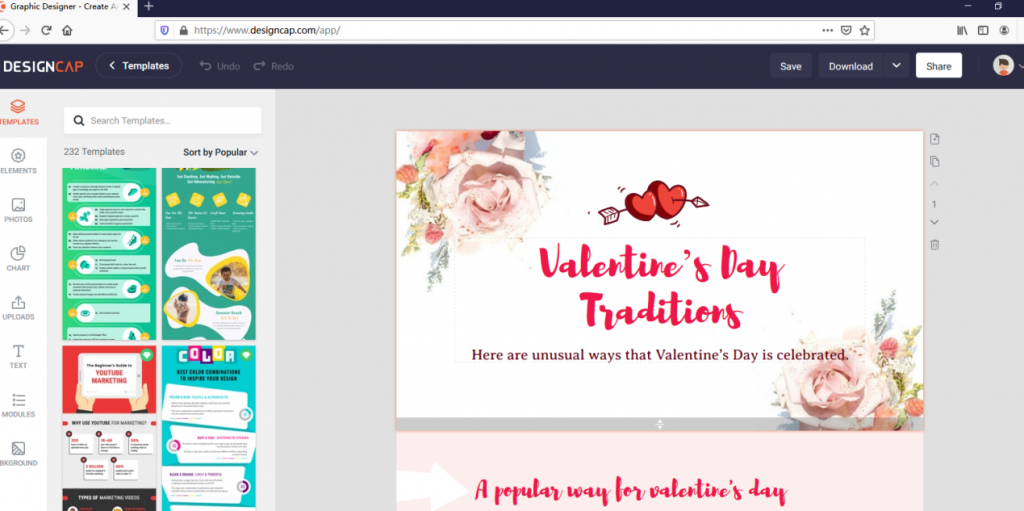
With no particular skill is required, anyone can design images like professionals. Powerful editing tools of DesignCap can customize their posters, flyers, community images, or other more graphic design images. When you click the ‘Create New’ button to create a new design, it offers you an extensive scaling list. You can open a ready-scaled template by choosing options such as Instagram Story, Facebook Post, Facebook Name from this list. If you want to create a custom project, just click on the ‘Custom Size’ button at the top. If you want to add visual content or similar content to your design that is not included in these categories, you can upload it from this tab to the panel immediately.
If you want to use this tool to create various infographics, for example, there are thousands of templates available, too. Choose one template that best fits you and start creating it. If you want to start the design from your own, you know how to get an informative infographic. Follow the regular steps of picking a theme, and outlining your infographic design to make it more readable. Besides the main title that describes the main theme of it, you may write subtitles and divide it into various sections. These titles, subtitles, and section dividers should be outlined well in your mind before starting your design.

When using the tool, it was possible to use the sizing options I wanted, adjust the background and the opacity of the images, and print in the format and title I wanted in a short time. Of course, you will be able to get a faster experience as you get used to the program.
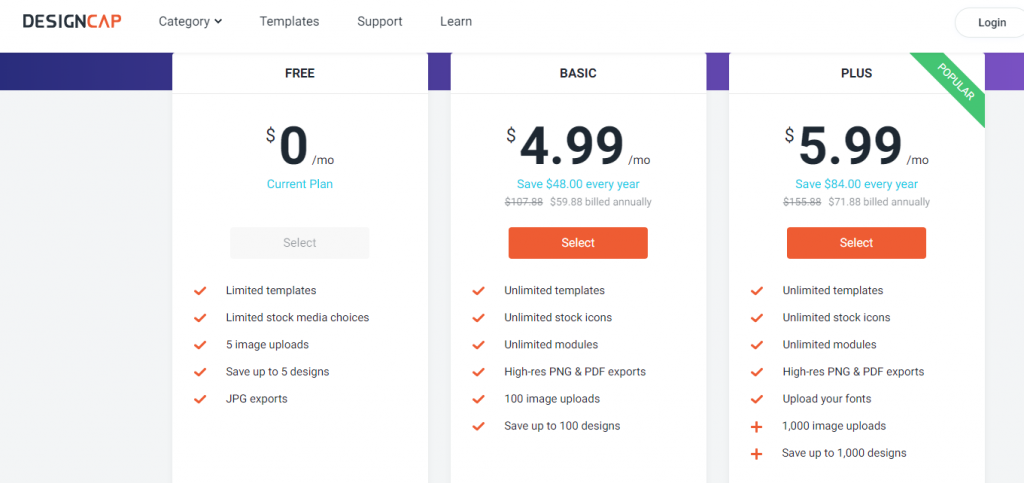
The platform provides free (FREE), basic (BASIC), and advanced (PLUS) plans. It is a free program when you enter the website. Of course, you have to register and log in to download your works, so it is recommended that you register an account before using it.

The free plan provides limited templates, limited stock media options. And you can just upload 5 images, save up to 5 design works, and choose JPG output downloads. The basic plan costs $4.99 a month and provides unlimited templates, unlimited stock icons, and unlimited modules with high-resolution PNG & PDF output download. And you can also upload 100 images and save up to 100 designs. The advanced plan is $5.99 per month, which provides unlimited templates, unlimited stock icons, unlimited modules, and high-resolution PNG & PDF output download. You can upload fonts, upload 1000 images and save up to 1000 designs. Therefore, if you have a great need for customization, it is recommended to upgrade to the advanced plan. You can use the fonts you need and upload more of your own image enhancement designs for an extra $1 per month, and you can keep more works. It can be modified and reused in the future. If there is a long-term demand, it is recommended to pay annually, which can save 50% of the cost.


